Embarking on your own canoe trip can be fraught with confusion about what to bring. This guide will show you the canoe camping checklist I use for planning what to bring on a wilderness canoe trip.
The luxury of travelling by canoe can mean bringing extra items that you’d leave at home if you were carrying everything on your back.
It can be really useful to see what others take to make comparisons with your own kit which is why I’m going to share all the equipment I took when we went on our recent two week trip to Finland.
Going abroad can have its own difficulties, especially if you’re bringing all of your own equipment with you as you have to be mindful of baggage weight limits and restrictions as well.
Being a flat water trip there is equipment that I left at home that would be required on a river trip. This is mainly safety items such as a helmet and extra-long ropes for tracking and lining.
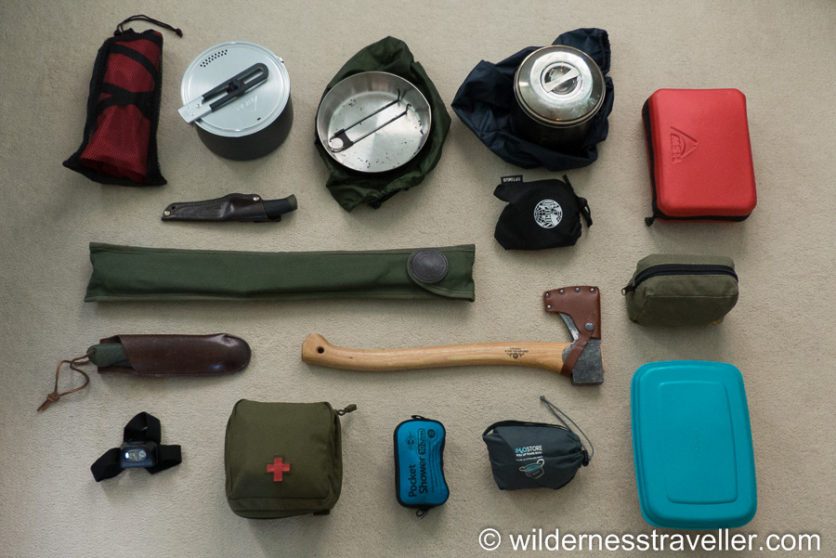
Main Gear
Cooking gear, water filter, first aid, tools and miscellaneous items such as our solar shower and folding bowl. The blue container on the bottom right is our canoe repair kit.
I always try to get equipment to fit into as few packs as possible. This just makes organising and carrying gear over portages much easier than having lots of small items to carry.
The main items we carried on this trip are:
• Canvas portage pack
• Food storage barrels
• Large duffel bag
• Camera case
I’m actually not a big fan of duffel bags but this one fits perfectly in our folding canoe and is also easy to carrying equipment through the airports. The canvas pack we use is a Burly Jack Great Glen Pack that fits two 30l blue barrels very well. It’s incredibly strong and I know won’t let me down on an extended journey.
As we bring a folding canoe with us on trips like this, we also had two duffel bags for carrying the canoe and paddles along with two folding trolleys to make transporting them easier.
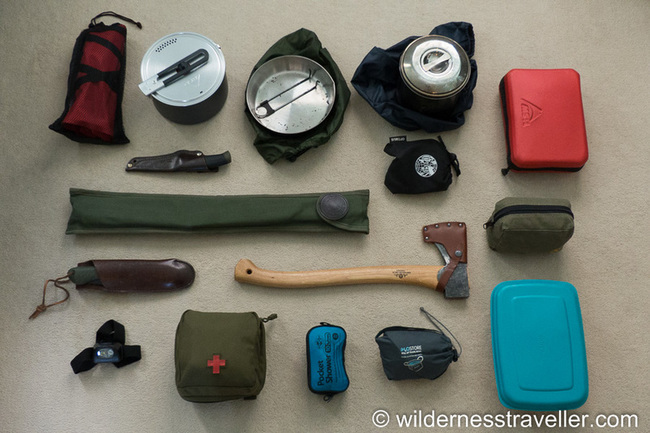
Shelter
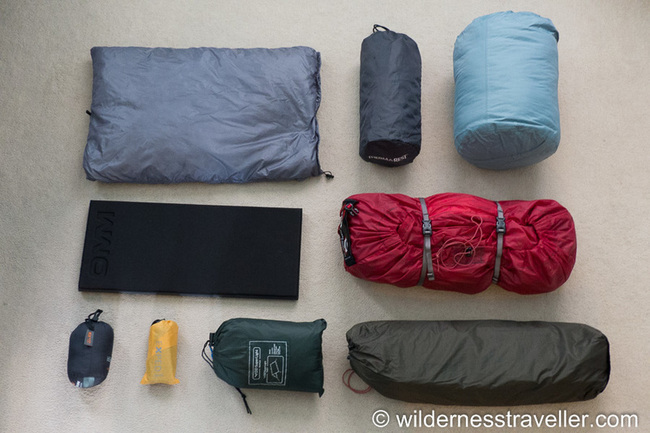
From top left to bottom right: Goosefeet Gear pillow case, Thermarest sleeping mat, Rab sleeping bag within a dry bag, OMM Duomat, MSR tent, Sleeping bag liner, Exped Aid Pillow, DD lightweight tarp and MSR Gear Shed.
Tent
The tent we used is an MSR Hubba Hubba NX. It was actually the first trip we’d used it on and it performed perfectly. It’s ideal for two or palatial for one as I found on my recent canoe trip to Scotland.
It’s very lightweight at only 2 kilos or just under 3 kilos including the optional gear shed that we brought with us for this trip. The gear shed gives you some extra room inside if you have to wait out bad weather. We were lucky as we had perfect weather for two weeks but you can’t plan on that.
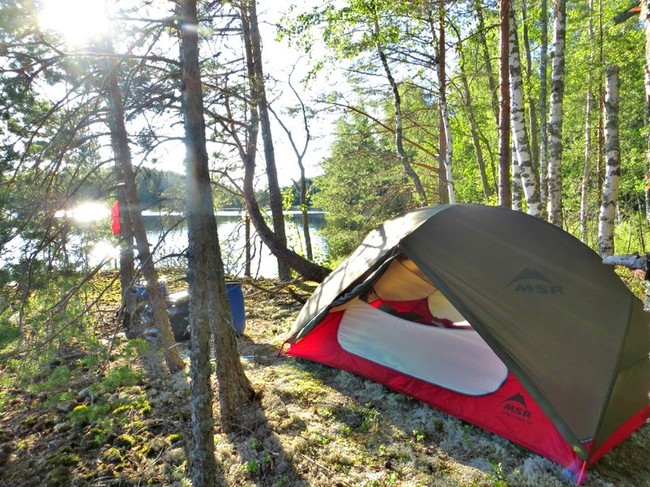
MSR Hubbu Hubba NX tent. Freestanding and very light.
A freestanding tent is very important when you’re taking trips that might require pitching on solid ground as we found in many places. It means you can pitch it using trees, rocks or roots and it will stand without any additional support. Also being able to pitch the inner or outer alone makes it very flexible.
We also used a groundsheet to protect the inner tent and always carry some extra tent pegs of different types depending on the type of ground.
Tarp
I always like to carry a reasonable size tarp as it gives a lot more flexibility to a setup. You can hang it to create more dry living space outside your tent, use it as a temporary shelter or raise it above a fire to protect it from the rain while you’re cooking.
I didn’t use it much on this trip as we had dry weather but if we’d had a lot of rain it would have seen quite a bit of use. The tarp I use is a 3 x 3 metre, DD Superlight Tarp which gives plenty of room underneath but only weighs 460g.
Sleeping Kit
For me, getting a good night sleep is one of the most important aspects, especially when on a longer trip. I would rather carry a bit more weight and have a comfortable sleep than try to go ultralight.
Sleeping bag
This depends on when and where I’m going but I should also disclose that I’m a fairly cold sleeper and so usually have to get a slightly warmer sleeping bag to be comfortable. On this trip which we took at the end of August, temperatures can vary quite a lot so I decided that my three season bag would be best.
I took a Rab Ascent 500, three season down bag. I prefer down to synthetic as it is lighter and more compact which is important when you’re having to keep within flight weight limits. You do have to make sure to keep it dry so I always double pack it in two dry bags to be on the safe side.
Sleeping bag liner
Marie likes to use a liner all the time and it has its advantages. It adds some warmth to the system and also keeps your sleeping bag cleaner. That’s more important when you use a down bag as they are much harder to clean properly than a synthetic bag. I don’t tend to use one much as I find it’s uncomfortable but then I do like to wriggle a lot in the night. If I do use one, I always use a silk liner as it’s small and light.
Sleeping mat
Having some insulation between you and the ground is very important. Through the ground is one of the quickest ways you’ll lose heat, not to mention that lying on the ground usually isn’t that comfortable. There are various options you can choose when it comes to sleeping mats from self-inflating options to traditional closed cell foam pads.
The warmth rating for a sleeping mat is measured in R Values. Basically the higher the number the more insulation it’s going to give you.
Again, what I choose depends on the time of year I’m going. In the winter I like to use an Exped Downmat as it’s very warm but overkill for a summer trip. For this trip I used a small Thermarest Prolite Plus self-inflating mat. It doesn’t weigh much and folds up very small.
I also often put an OMM Duomat under my feet and lower legs to keep them off the ground. This doubles up as my camping seat and also fits neatly at the back of my canvas pack for extra comfort.
Pillow
Some people are happy just to throw some spare clothes under their head and make do, however, I’ve never found this to be a very comfortable solution. I much prefer to have a proper pillow under my head as it makes a big difference to the quality of sleep I get. I try to keep this arrangement as small and light as possible by using an Exped Air Pillow UL combined with a Goosefeet Gear down pillow case.
Clothing
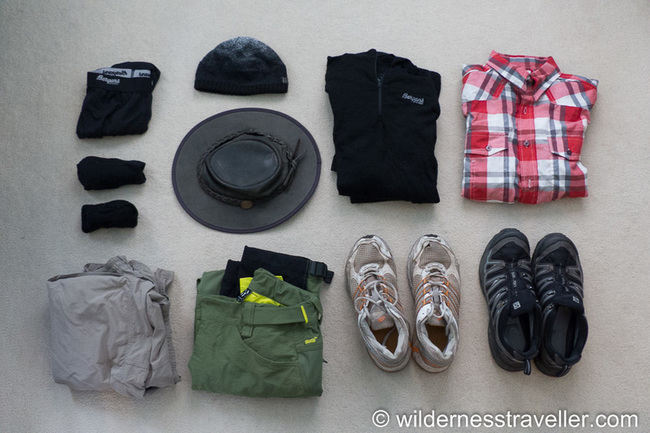
From top left to bottom right: Merino wool underwear, wool beanie, merino wool base layers, synthetic long-sleeve shirt, merino wool socks, large brimmed hat, lightweight convertible trousers, heavier weight trousers, old trainers and waterproof trail shoes.
Shirt
For a warm weather trip I take a couple of light, long sleeved shirts. I brought with me two polyester Tog 24 Condy shirts which unfortunately have now been discontinued. I think if I was going to replace them with anything now, I’d wear a Paramo Katmai shirt as I’ve found them great for hill walking in the summer. I prefer synthetic materials to cotton as they are quick drying and don’t lose all their insulating properties when wet.
Trousers
I usually wear quick drying trousers that can also stand up to a good deal of wear on a trip. My choice is based on time of year. I wore Craghopper Kiwi Convertible Trousers and Haglof Rugged II Mountain Trousers on this trip. In hindsight the Haglof’s were too warm for the conditions but the Craghopper’s were great as I was able to zip the bottoms off and cool down.
Sun hat
I like to wear a wide brim hat for protection from the sun. In this case it was a leather Foldaway Bronco Barmah hat.
Warm hat
I wear a warm, merino Smartwool beanie for chilly mornings and evenings.
Footwear
My footwear consists of an old pair of trainers in the canoe and a pair of lightweight, waterproof trail shoes when I’m in camp. On a summer trip I’ll bring along a pair of flip flops for warmer days around the camp.
Fleece
A really useful item of clothing for a bit of insulation. I always carry a lightweight fleece which I can put on if it gets a little chilly during the day or in bed. My current one is made by Regatta but any lightweight fleece will do the job fine.
Base layers
It’s rare for me not to wear some kind of base layer, except on particularly hot days. I wear merino wool exclusively for this as it’s warm, comfortable against the skin and quick drying. On a mild weather trip I bring a t-shirt and a long sleeve version as well as a pair of merino leggings.
There are a number of good brands such as Smartwool, Woolpower, Icebreaker and Bergans. My socks and underwear are also usually made from merino wool.
Neck gaiter
It’s surprising how much warmth you can lose through your neck so I always bring a fleece neck gaiter with me for extra warmth should I need it.
Wool gloves
These go in a small bag with the neck gaiter, warm hat and spare base layers in case it gets cold. Even in August I did wear the gloves once or twice on chilly mornings.
Wind Shirt
Sometimes, when out in an exposed area such as a large lake, you can start to feel quite chilly even in a light breeze, especially on an overcast day. When wearing a fleece is overkill I like to wear a very lightweight windproof jacket. I took a Montane Lite Speed Jacket with me which packs up into a fist sized ball when not being used. It sheds the wind really well without providing any real insulation.
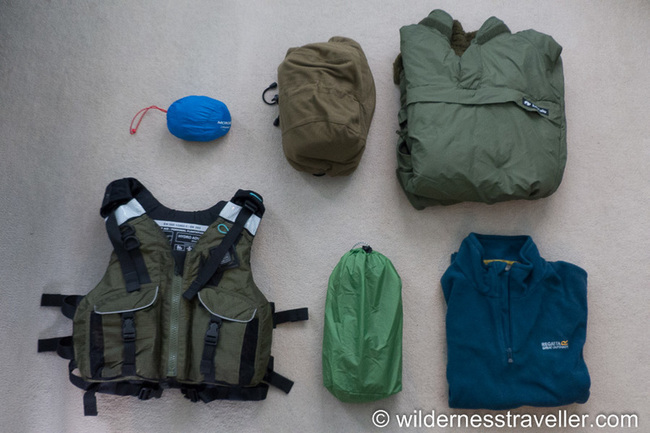
From top left to bottom right: Wind shirt, waterproof jacket, Buffalo jacket, buoyancy aid, chilly pack and fleece top.
Buffalo jacket
I bring a Buffalo Special Six Shirt in case I fall in. I can wear it as a single layer and can get warm in no time even if I’m wet. It provides immediate insulation and it’s also windproof. I sometimes wear it on cold evenings as well.
Waterproofs
It’s vital to have good waterproof clothing in case of prolonged rain. Without them you take the risk of hypothermia as your body loses heat up to 25 times faster when wet. Having a waterproof jacket that is robust and effective on a long trip is really important. I take a Ridgeline Monsoon Elite Smock which has a long back to keep your bum warm as well when sitting down.
For legwear I usually carry a pair of simple waterproof over trousers unless I’m expecting to do a lot of wading, in which case I’ll wear a pair of waterproof salopettes.
Cooking
Gas stove
I use a gas stove when possible as it’s efficient and light, providing I know that there’s compatible fuel canisters in my location as you can’t bring them with you on the plane.
The preferred method of cooking, but it’s important to have a backup such as a simple gas stove.
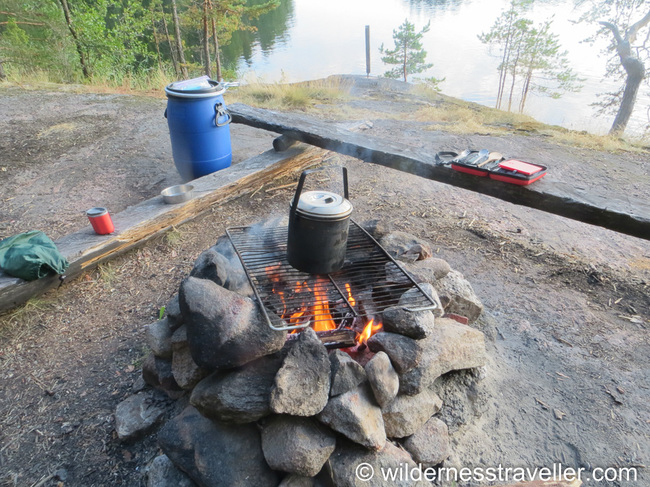
Generally I’ll cook over an open fire when possible using a folding metal grill but on occasions when having a fire isn’t possible or I want to get something hot very quickly then I’ll use the gas stove. The model we take with us is an Optimus Vega, which is very portable but also has a decent base to put larger pans on.
Pots and pans
We bring with us an MSR Quick 2 Pot Set which includes most of what we need. It has two deep cooking pots made from lightweight aluminium, two insulated mugs and two deep sided plastic bowls. We add to that a small billy can and a lightweight frying pan which covers all the types of cooking we do when out in the wild.
Kitchen Tools
Again we go to MSR again for this one with their Alpine Deluxe Kitchen Set. It has pretty much everything we need including a sharp knife, chopping board, various spatulas, salt and pepper shaker as well as a drying cloth. We add some extra items such as olive oil, spare ziplok bags and paper towels.
Cutlery
When travelling solo and keeping things light I tend to just take a spoon but when on a longer trip it’s nice to have proper cutlery so we use two sets of Alpkit titanium cutlery which are lightweight and durable. That also fits inside the kitchen set, keeping everything in once place.
Heatproof Gloves
I always carry a pair of heatproof gloves for cooking over an open fire.
Water
Water Filter
One of the most important bits of kit. Drink contaminated water and you could be in a whole lot of discomfort. Some waterborne illnesses remedy themselves quickly while others can spell long term health issues. It’s something I’d rather not worry about while on a trip.
The easiest way to ensure the water you drink is safe is to simply get the water to a rolling boil for a few minutes. This will kill just about anything nasty but does use a lot of fuel and also means you‘ll be drinking warm water a lot.
I carry some chlorine dioxide tablets as a backup but my preferred water treatment is using a filter. There’s various types you can use, from pumps to UV pens but I’ve found the quickest way is by using a gravity filter.
It’s looking to be a bit of an MSR love-in but we just pick what works for us. That just happens to be MSR quite a lot. We use an MSR Autoflow Gravity Filter for most of our water filtration needs. It’s easy to use, quick to filter water and easily maintainable.
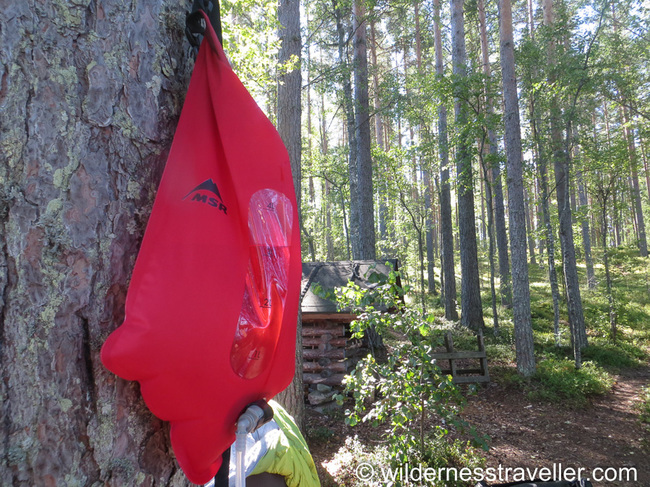
The MSR Autoflow Gravity Filter.
I should mention that this filtration method doesn’t filter out chemicals or viruses but neither of these are likely to be prevalent in the areas that we travel. We do try to make sure that the water we collect is from a clean source, so not near grazing animals or outflow pipes.
Water Storage
We pair this with an MSR Dromlite Bag to collect the filtered water into. A four litre bag full of filtered water usually lasts us for an evening in camp, including filling up our water bottles for the next day. We use two Nalgene wide mouth bottles.
First Aid
We always bring a well-stocked first aid to deal with any minor emergencies. I won’t go into the individual details of each item but I will list what we take with us generally.
The most important thing is making sure you know how to use anything you take with you so going on a first aid course every few years is a good idea.
Here’s what our first aid kit consists of:
• Plasters
• Personal medication
• Pain killers
• Gauze swabs
• Tick removal tool
• Shears and scissors
• Bandages
• Safety pins
• Small head torch
• Antiseptic wipes
• Gloves
• Blister pads
• Tweezers
• Antihistamine and Hydrocortisone cream
• Micropore tape
• Antibacterial hand wash
• Allergy tablets
• Constipation tablets
• Stomach tablets
• Emergency tooth repair kit
Safety Gear
Buoyancy aid
An essential item for a canoe trip. I carry a whistle and knife in one pocket, along with my car keys in a waterproof pouch. In the other pocket I have a long line of tape with a karabiner attached which has a multitude of uses.
Swim line
Attached to the canoe is a 20m swim line in order to get the canoe back to the shore, should we fall in.
Bailer and Sponge
We keep these attached inside the canoe. The sponge can be very useful for cleaning things as well as mopping up water.
Camera Gear
I always carry a camera with me on any long trip. One of the joys of going on a trip is capturing the memories to enjoy later. I also find I take closer attention to the smaller details while trying to get the perfect shot.
I’m in no way a great photographer though I’m always trying to learn how to improve. Here’s what I generally take with me.
Photo taken with my Panasonic FZ200.
Camera
I’m currently using a Panasonic FZ200 Bridge Camera for most of my photography. It’s a good compromise camera. It has a decent zoom lens for capturing wildlife but can also handle landscapes and low light photography reasonably well. It’s definitely a compromise but means I’m only carrying the one camera with me. I can shoot in RAW which is one of the most important factors so that I can edit my photos later one.
Accessories
I always take a number of spare batteries with me especially on a longer trip as well as a couple of spare memory cards.
Camera Case
I keep my camera and accessories in a small, waterproof Pelican Case.
Other Equipment
Axe
I use a Gransfors Bruks Small Forest Axe. It’s a popular design and is very versatile in terms of size and function. Great for processing large amounts of wood quickly but the most dangerous piece of equipment to use. If you’re not sure how to use one safely then don’t bring one with you.
Folding Bucksaw
The 24 inch Bob Dustrude Quick Buck Saw is a great piece of equipment. Safer than using an axe and able to get through firewood quickly. The 24 inch model is a good compromise between portability and the ability to process larger logs.
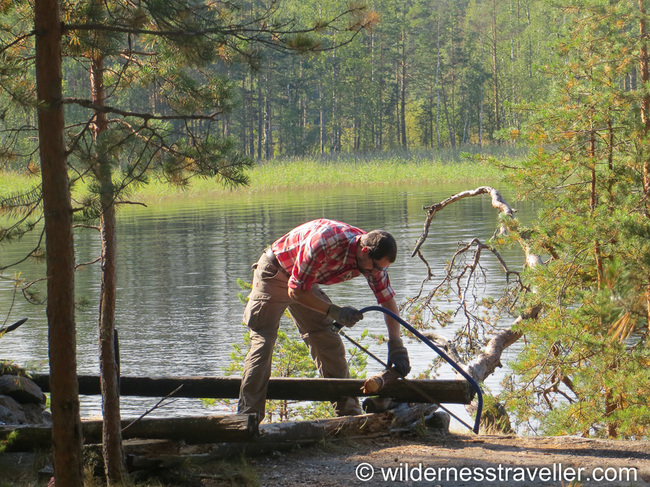
A bucksaw is very effective at processes large quantities of firewood.
Folding Saw
As well or instead of the bucksaw, I always carry the Bacho Laplander folding saw. It’s a small one-handed saw that really useful. It won’t process large logs like the bucksaw will but it can prune small limbs.
Stainless Steel Knife
I carry a very sharp Mora Clipper stainless steel knife. I prefer a stainless steel blade where it could come frequently into contact with water such as when canoeing. This particular knife is very inexpensive and durable. On a longer trip I sometimes carry two in case one breaks especially when used regularly for battening wood.
Head Torch
We have one of these each and both use a Petzl Tikka Plus. It’s very bright and has a number of functions including different beam settings and colours. The batteries last a long time but we always carry a couple of spare sets with us.
Solar Shower
This is a bit of a luxury item but there’s nothing like a shower to make you feel human again after a few days in the heat. You could just jump in the lake of course but I don’t like using any washing products near the water as it pollutes it.
We have a Sea to Summit Pocket Shower which holds about 10 litres of water. That’s enough for about 15 minutes of use. As the shower is black it soaks up the heat if you leave it in the sun for a few hours, though only enough to take the edge off.
Folding Bowl
We use a Lifeventure Collapsible Bowl to have a quick wash away from any water sources or for washing dirty clothes.
Maps
We always take detailed maps of the area and keep them in a clear, waterproof case. Loksak waterproof cases work perfectly for this.
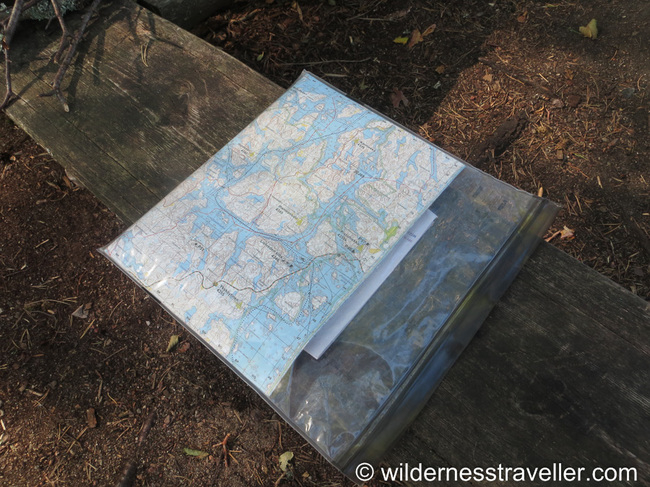
Maps in waterproof case.
Canoe repair kit
When on a longer trip, some maintenance to your canoe may be required. On a flat water trip you may be unlikely to have any issues but it’s better to be safe than sorry. As we bring a folding canoe with us there is a danger of puncturing it or damaging the aluminium frame.
Here’s a list of the items we take with us:
• Bolts and screws
• Duct tape
• Multi-tool
• Strong glue
• Plastic pull ties
• Cord
• Repair patches
Extras Pouch
I always carry a small pouch with various useful items which you might call a survival kit. Some I use every day while others are there just in case. I won’t go into the details of each item other than listing them here but you can get some more information on a number of these items and their usefulness in this helpful article.
• Bandana
• Hank of paracord
• Firestarter’s
• Cotton wool
• Vaseline
• Matches in waterproof case
• Fire steel
• Whistle
• Sharpening stone
• Spare batteries
• Alarm clock
Miscellaneous Items
• Book – for reading of course.
• Phone – for making emergency contact (though don’t rely on it) or checking the weather.
• Battery Pack – used to charge electronics such as camera equipment and mobile phones.
I hope you’ve found this useful and it gives you some ideas.
Is this similar to what you take on a long canoe trip? Let me know in the comments below.
Disclaimer – I lot of the links in this article are affiliate links which means if you make a purchase I get a small commission. It won’t cost you any more to buy the item this way but it’s a really great way to help me support the blog.
Related Products
Share this Post